
After a year in our first home, the kitchen remains a bit of a challenge. The biggest update so far was getting rid of the huge pub table that was built in to the counter top, which I removed and replaced with a window seat with lots o’ storage. That got us part-way towards my goal of designing an eat-in area for our super-tiny very cozy 60’s ranch kitchen. I knew I would need a small-ish pedestal style table to accommodate the window seat setup. I had been contemplating building one from scratch until…
Finally, y’all! I just found this amazing table at my favorite-of-all-favorites antique store… woo! (Better yet, I sent a courtesy a pic to the husband, and he loves it too!) Woo-hoo! 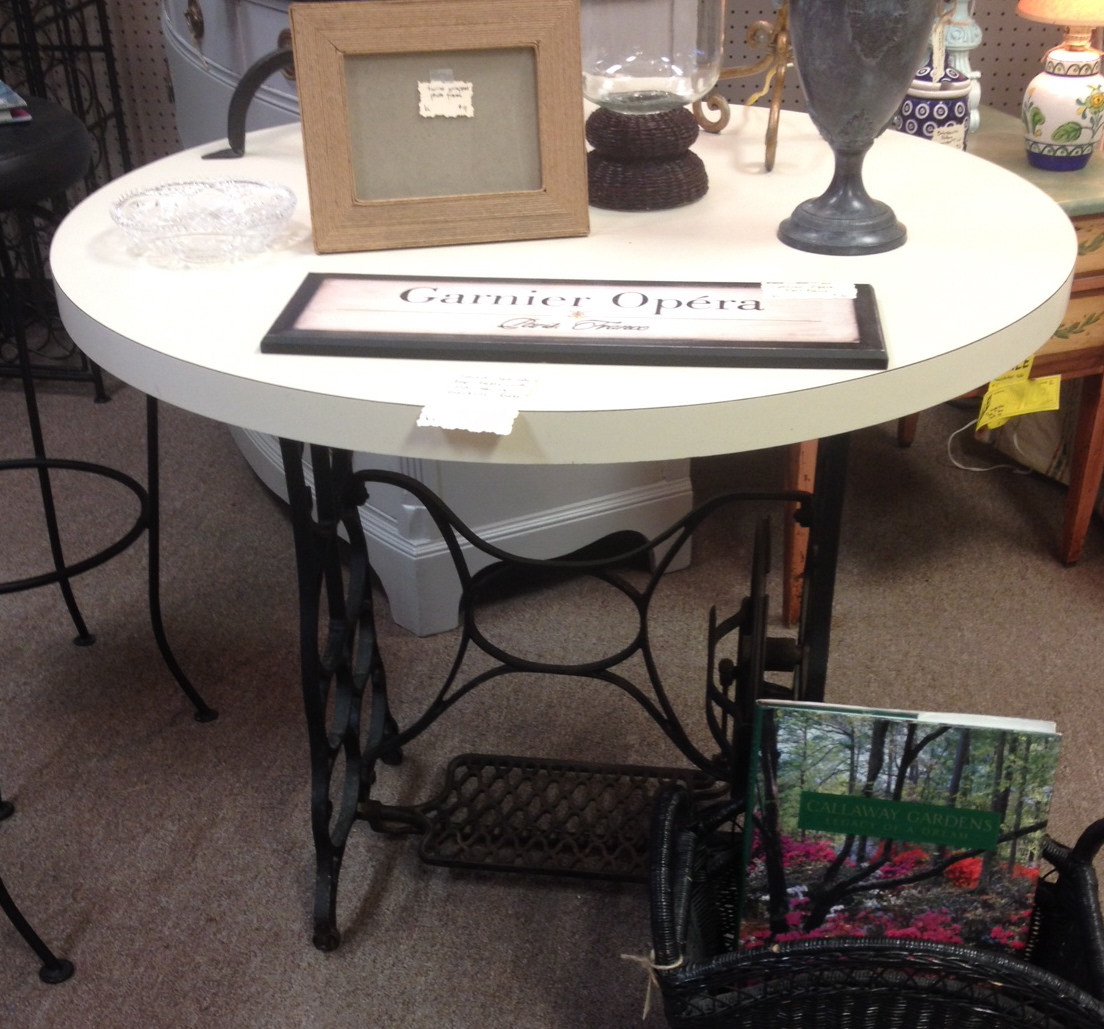 Cute, right?! This table has a lot going for it (including a fully-operational foot pedal that Adam wants to rig into some sort of possibly dangerous, high-performance lazy susan) but let’s be honest… the top is kind of weird. It’s laminate, but not your average furniture-grade “trying to look like wood” laminate. It’s more like kitchen counter-style laminate, which is a weird look for anyone who’s not a kitchen counter. (And truly, kind of weird for them as well.) It’s almost like the top was repurposed from a restaurant table or something. Kind of sterile and, well… not-so-pretty. I asked the lady at the checkout if she would consider selling me just the base… but she was much too smart for that. (I can only assume she didn’t want that weird top laying around, either!) And it’s a good thing, because original my plan was to go straight home and build a new table top from scratch using various wood scraps from the garage. But when she politely suggested I “find a way to dress it up” when I told her I wasn’t crazy about the top, I was all, “CHALLENGE ACCEPTED!”
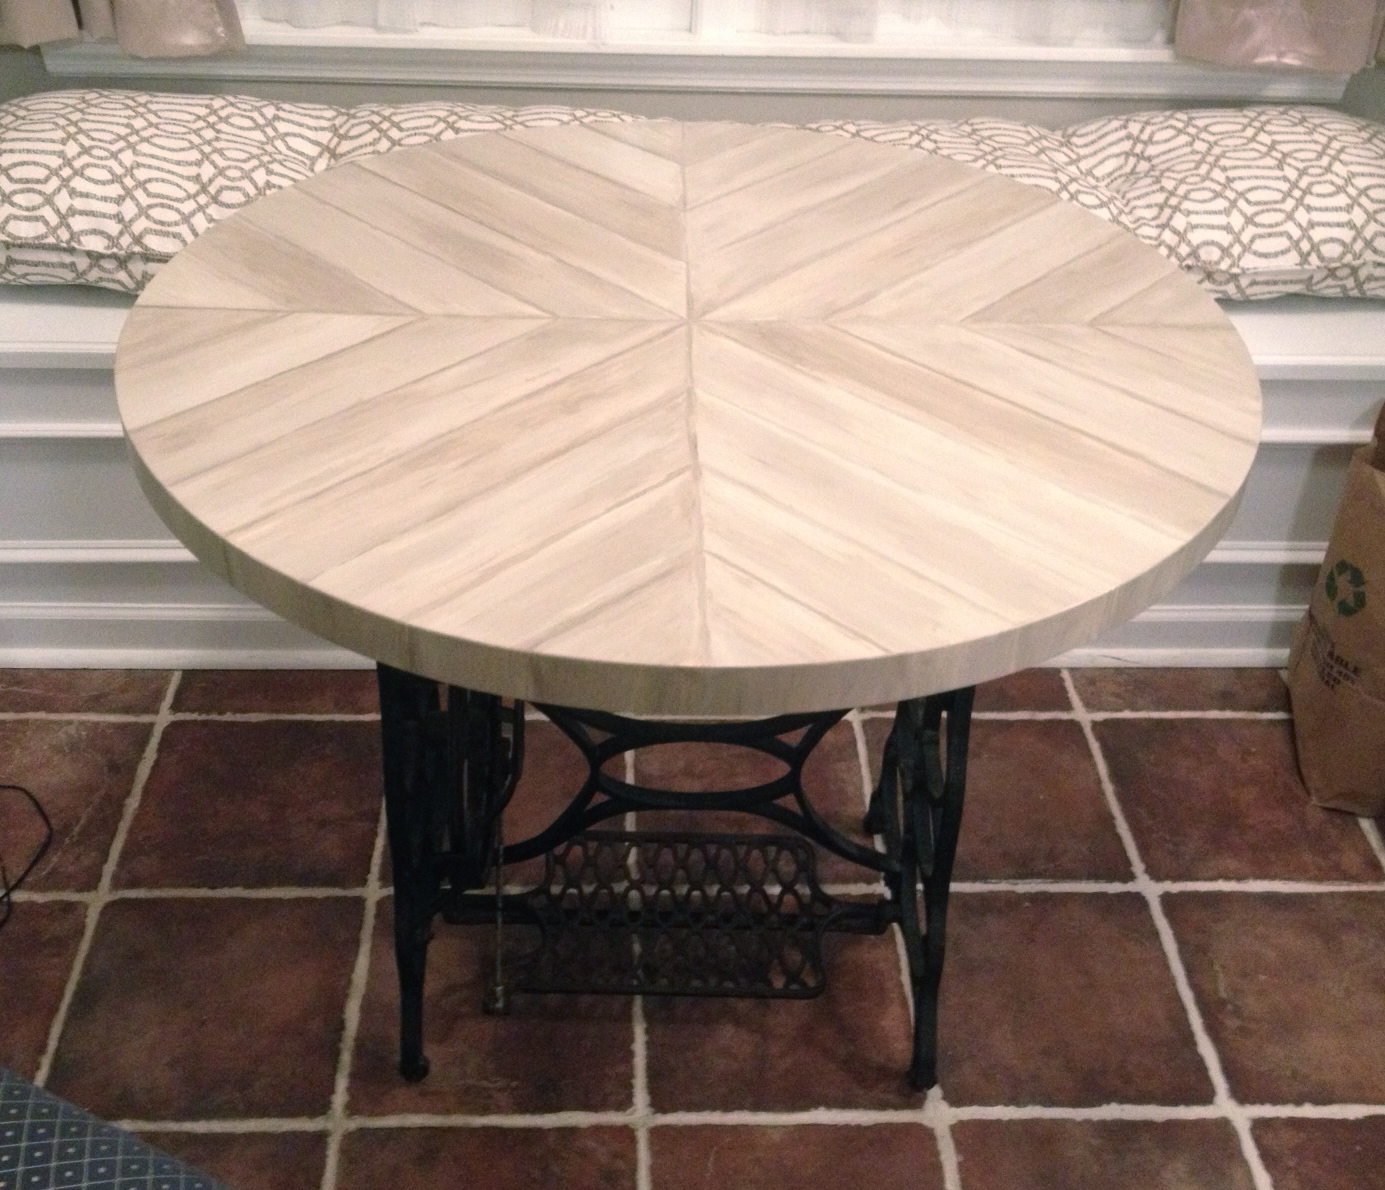
I decided it’s just the right kind of quirky with its sewing table base and modestly-sized top. My sweet husband helped me get it into place in the kitchen and it fits just right! Of course, Murph Cat had to come investigate immediately. He is violently shaking his head in this pic, which is why he looks a little poltergeisty.  So instead of making a new wood plank top, I decided to work with the one I had by painting it. I started by sketching out a pattern. Try not to be intimidated by my super advanced drawing skills.
 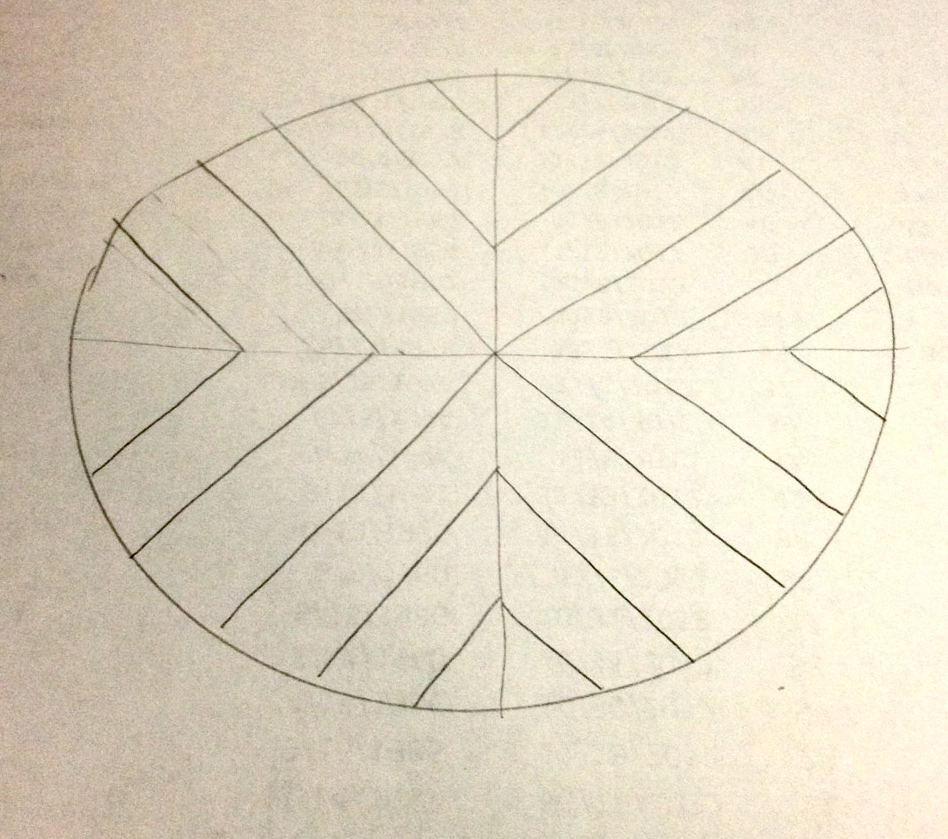 Impressive, right? Now you see why I am a graphic designer by trade.
Then, I prepped the surface by sanding it with a 180 grit disc on my orbital sander. I had to remove the top and ROLL that sucker outside. No joke, it probably weighs at least 80 pounds.  I also took the important step of snapping a safety-selfie. I ALWAYS wear a mask when sanding!
  Once I had sanded off the finish, I applied 2 coats of Zinsser primer (not shown.) Then, the real fun began. Who knew this would require advanced geometry?!
 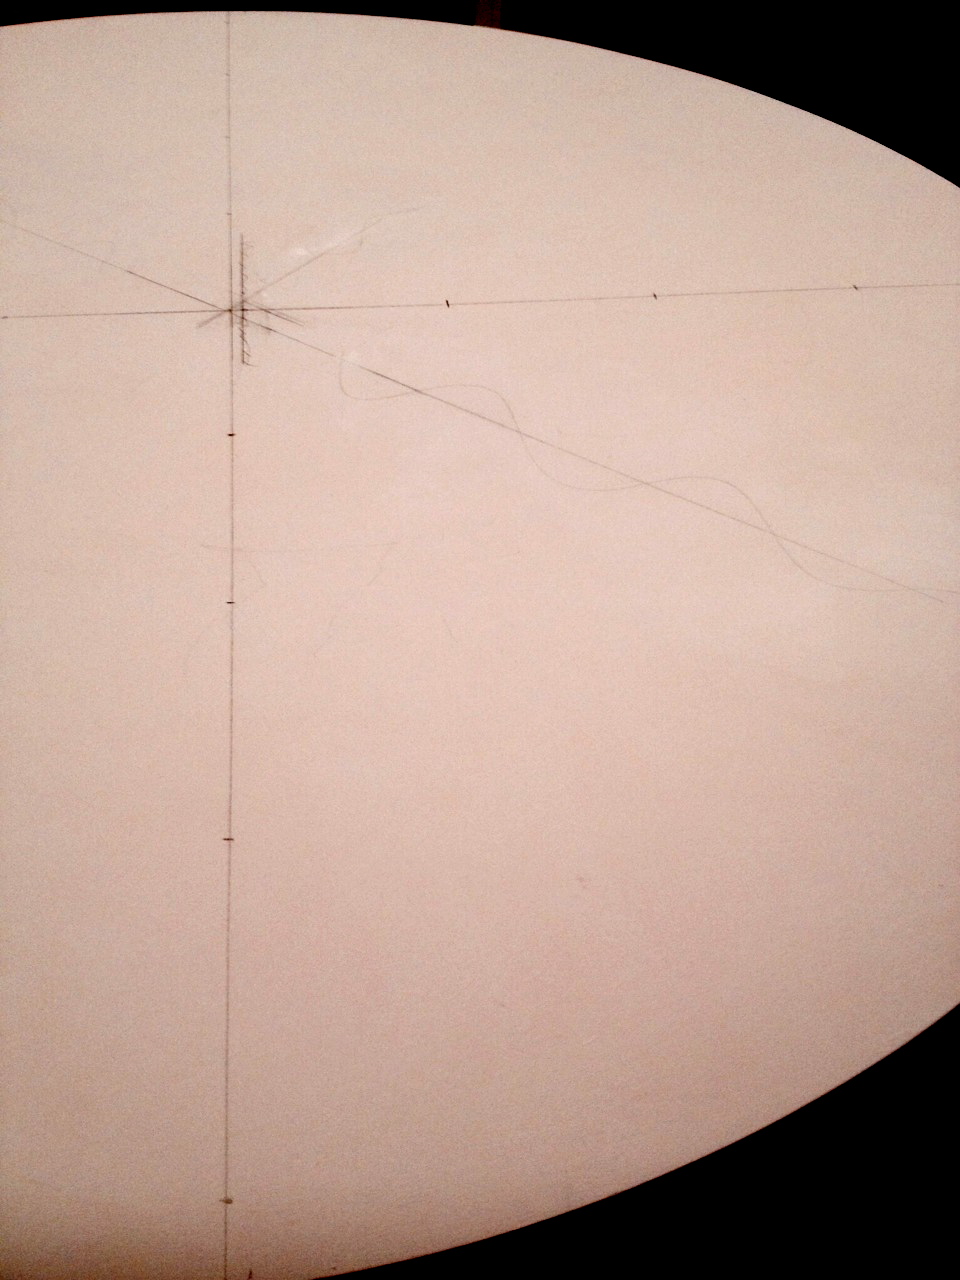 Clearly, you can see I had some trouble with my measurements and markings. For the record, it is SO hard to find the center of a circle! It occurred to me only afterwards that the proper solution would have been to trace the entire top onto a piece of paper, cut it out, and fold it in half twice. Oh, so NOW my brain decides to start working! But that’s OK… the trial and error method works, too. Once I had the table top divided into quadrants, I grabbed a 1×4 board (about 3 feet long) from the garage and cut one end into a 45 degree angle to use as a guide for the pattern. (Sorry, not shown, but you’ll get the idea.)
 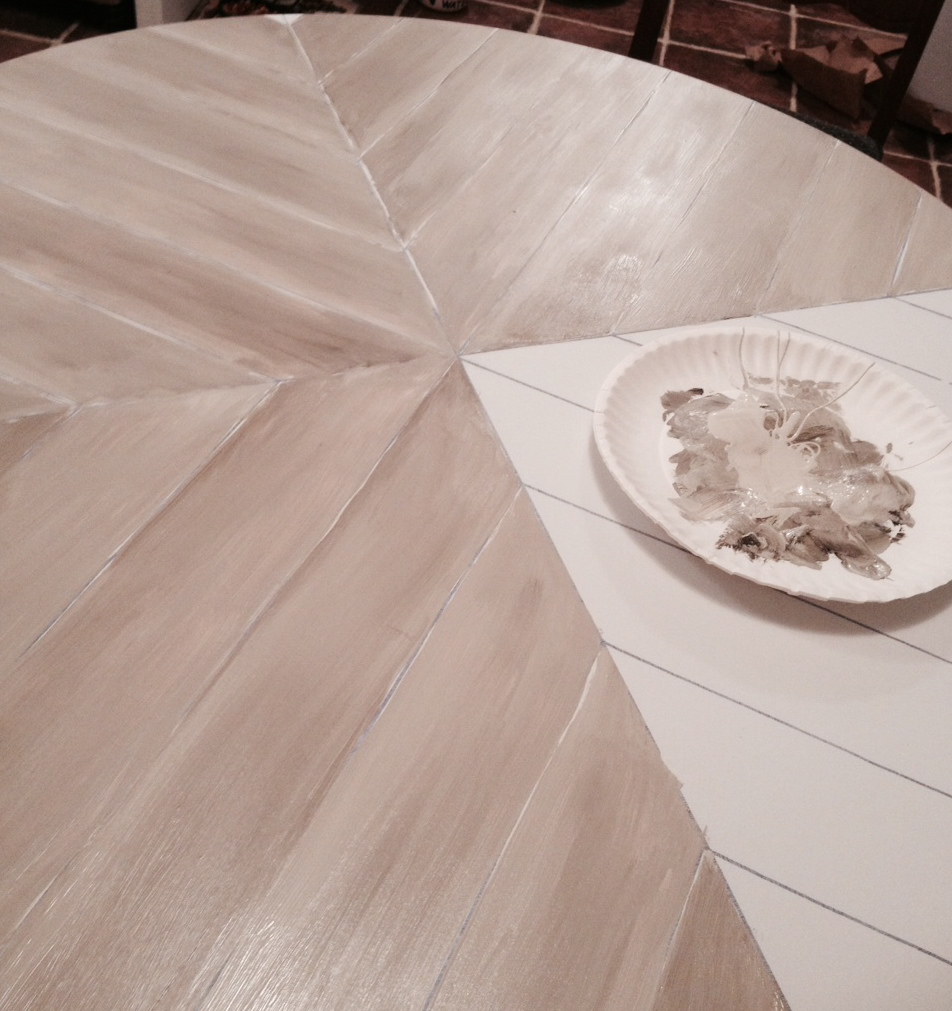 Note the very professional paper plate paint palette. Clearly I take my work very seriously.
At last, the fun part! I took some greige (Behr Sculptor’s Clay) wall paint I had left over from painting our master bathroom and mixed it with varying amounts of black-brown acrylic art paint. I grabbed different shades of paint to create a wide range of gradients. I applied the paint with a 1″ sponge brush in long strokes to create a wood-grain type effect. The intent was never to look realistically like wooden planks… but just to give it that sort of feel. 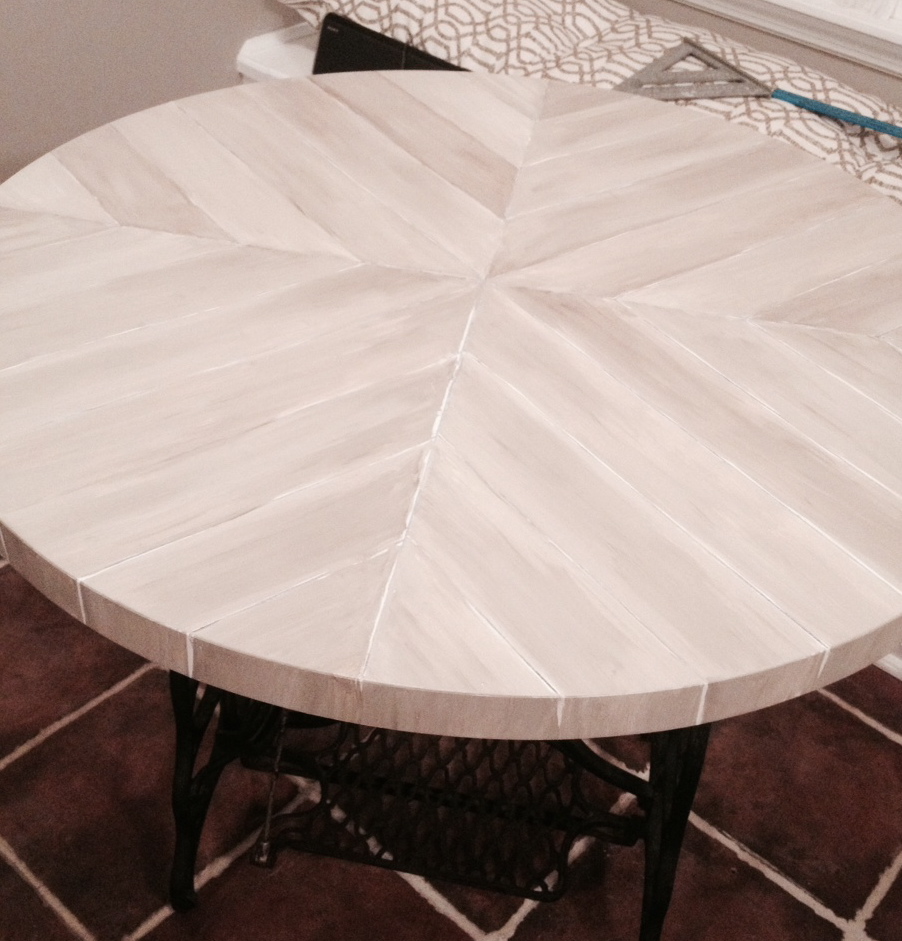 At first I left the outlines partially white so I could fill with the darker brown later (thinking, “shadows suggesting gaps between the planks”), but I ended up going back in and spongeing over them after I saw that the color striations created enough definition of their own.
HOWEVER… that all changed when I came back the next day and realized that my Sharpie lines had “eaten” through the paint and surfaced back to the top like some sort of paint-resistant zombie ink. I had to paint over all the lines the next day after all. Mental note: NEVER use a Sharpie to draw paint lines. That stuff is weird-strong!  Luckily, the end result is still pretty sweet looking. I’ll show you both possible results… before and after the Sharpie debacle.
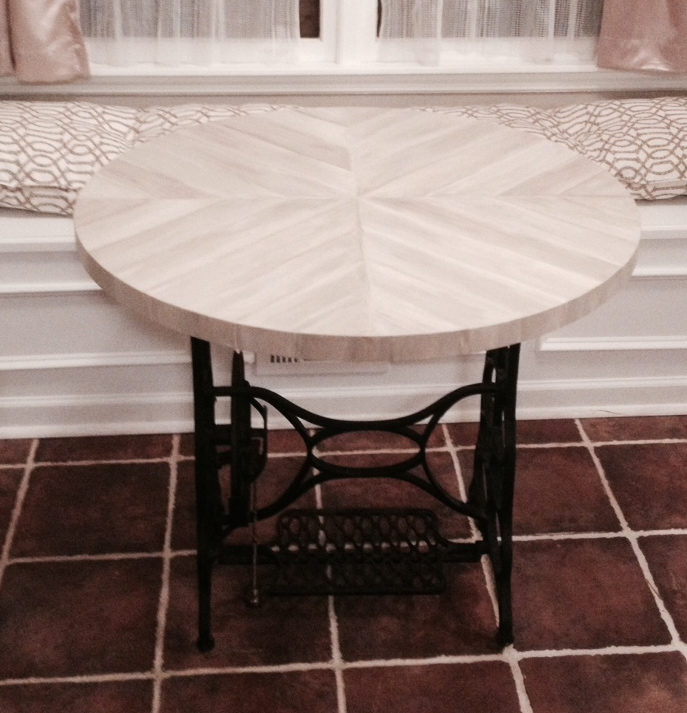
 Not gonna lie… I tend to think it looked better “before” when the pattern was more subtle and before the zombie Sharpie came back to haunt me. But what are you gonna do? I suppose the brown lines are better than the weird purply-blue ones that the Sharpie left behind/beneath/on-top-of-everything-important.
So at the end of the day, I still think it looks pretty good. I had to make some compromises due to poor material selection on my part, but that’s just the way it goes! I think it’s much better than where we started, anyway. And when the paint and poly fully cure in about 2 weeks, I will finally have my first official casual, comfortable meal in the kitchen!
UPDATE:
Two days later and I am still having to go back and paint over some of the Sharpie lines in certain areas and then add another coat of poly. Apparently, this was a really blonde thing to do, because so far no one has had any sympathy for my plight and seems to think it’s ridiculously common knowledge that paint and Sharpie don’t mix. (“Lindsay, you’re telling me YOU didn’t know that? EVERYONE knows that!”) Well somehow I managed to survive 20+ years of crafting and painting without this ever becoming apparent to me… but I will certainly never forget! Truly, I can just feel myself getting smarter with every dumb mistake. 😀
Thanks for reading!
XOXO
![]()


